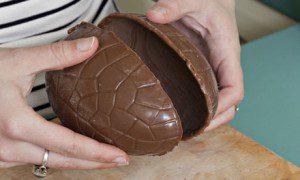
How To Make the Perfect Easter Egg
How To Make the Perfect Easter Egg
It’s easy to get excited by the idea of making your own Easter eggs each year but under the stresses and strains of everyday life, it’s far easier to pick up the special offers in the shops.
But nothing can compare to the magic of rolling up your sleeves, putting the radio on and spending a few hours with your little ones making your own eggs.
Here’s what you’ll need:
- 300g cooking chocolate
- thermometer (preferable but not essential)
- plastic Easter egg moulds – available from craft shops and supermarkets
- egg decorations
Here’s how to make perfect eggs:
The chocolate.
Firstly, grab yourself some quality cooking chocolate. If you’re cooking for milk-allergic people, it goes without saying that you’ll need to get yourself some dairy-free alternatives. You’ll need about 300g of the brown stuff.
Step One: Melt the chocolate.
It’s not rocket science but popping the chocolate in a heat-proof bowl over a pan of simmering water is the traditional way to melt the chocolate. Best to not let the kids get involved with this bit to avoid scalding.
If you don’t have a thermometer, gently melt the chocolate as per the instructions but you may find that the chocolate appears a bit mottled upon drying. This won’t affect the taste however. For perfectly smooth chocolate however, follow the details instructions here.
Chop three quarters of the chocolate (300g/10 1/2 oz) on a chopping board, using a serrated knife.
Then finely chop the remaining quarter (100g/3 1/2 oz). You can process it with the blade knife attachment of a food processor if you find this easier.
Place the roughly chopped chocolate in a heat-proof bowl. Half fill a saucepan with hot water, and put the bowl over it, making sure that the bowl does not touch the bottom of the saucepan. Slowly heat the water, ensuring it does not boil. Alternatively, use a microwave oven if you wish, but in ‘defrost’ position or at 500W maximum. Stir regularly using a flexible spatula so that the chocolate melts smoothly.
Check the temperature with a thermometer. When it reaches 55°C-58°C (131°F-136°F) for bittersweet/dark, or 45°C-50°C (113°F-122°F) for milk or white, remove the chocolate from the saucepan.
Set aside one-third of the melted chocolate in a bowl, in a warm place. Add the remaining finely chopped quarter (100g/4oz) of the chocolate into the remaining two-thirds of the melted chocolate, stirring constantly. Bittersweet/ dark chocolate should reach a temperature of 28°C-29°C (82°F-84°F); milk chocolate should reach 27°C-28°C (81°F-82°F); and white or coloured chocolate should reach 26°C-27°C (79°F-81°F).
Add the melted chocolate that you have set aside to increase the temperature. Bittersweet/ dark chocolate should reach 31°C-32°C (88°F-90°F); milk chocolate should reach 29°C-30°C (84°F-86°F); and white or coloured chocolate should reach 28°C-29°C (82°F-84°F). Stir until the right temperature is reached.
Step Two: The First layer.
This is where the kids can get stuck in. Allow the chocolate to cool a little and then using a pastry brush, spread the chocolate evenly inside the two mould halves and leave them to set for five minutes in the fridge.
Step Three: The Second layer.
Warming the remaining chocolate ready for the second layer, bring out the two set halves and add another layer added. It’s up to you whether you strive for perfection or you’re not bothered. The eggs will need to set for a good two hours in the fridge afterwards.
Step Four: Atonement
Easing the egg shells out of their moulds is perhaps the most nerve-wracking part of the process. Will the wait be worth it? Will you have to start all over again?
Hopefully, the two shells should be gently eased out onto some greaseproof paper to a large collective sigh.
Warming the remaining chocolate once again, using the pastry brush, you should now apply chocolate to the shell rims (as if you were applying glue) and then hold together. It’ll take about 20 minutes to dry completely so if you can set the eggs down to dry somewhere, it’ll save you standing there for 20 minutes looking like a numpty.
Step Five: The Magic of Decoration
Re-heating just a tablespoon of chocolate and using it as ‘glue’, you can add all sorts to the egg – chocolates, shapes or ribbons.
If you own a piping bag, use chocolate or icing to create your own artistic images or messages.
Marzipan is so versatile and great for kids to use. Let their imaginations run wild!
Have fun!
o o o o o o o o o o o o o o o o o o o o o o o o o o o o o o o o o o o o o o o o o o o o o o o o o o o o o o o o o o o o o o o o o o o o o o o o o o o o o o o o o o o o o o o o o o o o o o o o o o o o o o o o o o o o o o o o o o o o o o o o o o o o o o o o o o o o o o o o o o o o o o o o o o o o o o o o o o o o o o o o o o o o o o o o o o o o o o o o o o o o o o o o o o o o o o o o o o o o o o o o o o o o o o o o o o o o o o o o o o o o o o o o o o o o o o o o o o o o o o o o o o o o o o o o o o o o o o o o o o o o o o o o o o o o o o o o o o o o o o o o o o o o o o o o o o o o o o o o o o o o o o o o o o o o o o o o o o o o o o o o o o o o o o o o o o o o o o o o o o o o o o o o o o o o o o o o o o o o o o o o


